


Unfinished Dream of All Living Ghost
Unfinished Dream of All Living Ghost is the latest versus shooting game in the Touhou series, that came out this year (2023 at the moment of writing). It works pretty much the same as PoFV and PoDD, but has a few of its own peculiarities.
Gameplay Basics
Controls
The game opposes two players on a split screen setup. Each part of the screen dedicated to a single player will be referenced in this guide as "field". In this game, the controls are more complex than usual: you have three of them.
- A can be held to fire a character's basic shot, which is their main way to deal damage to enemies on their field
- B can be held to activate a character's scope and charge up their meter/gauge, which allows access to special attacks
- C can be pressed to bomb, clearing patterns and enemies off the field
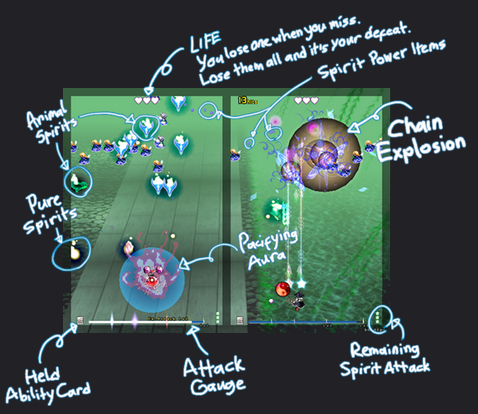
Hearts
Health in this game is represented by hearts, however, as opposed to most other games of its kind, a hit will only damage a single heart. That is, only if said player getting hit doesn't have their shield up.
Shield
In this game, since there aren't many ways to clear danmaku off the field, players instead get a shield, which allows them to sustain one hit without losing a life. These get replenished by default whenever a player loses a heart, or uses their C3/C4 meter attacks (see below)

Special attacks
First, let use define a few terms to make understanding of this guide easier:
- Gauge/meter refers to the pipe displayed below each player's field
- Energy refers to how much of this pipe is currently filled up
- Opponent refers to the other player (player 2 if you are player 1 and vice-versa)
Using energy, a player can fire up to 4 different special meter attacks:
- C1, also referenced as charged shot, is usually a stronger version of a character's shot
- C2, also referenced as skill, is a special ability that differs wildly depending on the character played
- C3, also referenced as extra attack in game, usually fires several ex attacks (also called passive attacks)
- C4, also referenced as boss attack in game, sends a nonspell or a spellcard over the opponent's field

The charge speed, as opposed to PoDD and PoFV, is the same for every character. However, the breakpoints for each attack has a few variations on some characters (usually making C1, C2 and C3 more or less expensive).
Items
Items are the only way to refill your meter's energy. There are two ways to generate them in this game.
- Killing enemies, in particular chaining several kills under a short time span grants bonus items.
- Bullets entering your scope
- Grazing
Enemies
There is a pretty great diversity of enemies in this game. Killing one of them by default does not reward any item, you need to kill several of them in a chain one after the other in what is called a combo chain to spawn some. Killing one will however always will trigger an explosion the size of which depends on the kind enemy killed. An explosion is a circular area in which splash damage is dealt to other surrounding enemies, including any opposing character boss on your field. It also cancels pellets (and popcorns) in their vicinity and sends them back to the opponent's field.

Whenever you kill several base enemies in a row, the hit combo display is incremented for each kill. As long as you hit a base enemy, it will not reset, however, as soon as you stop hitting one, an internal timer starts (its length depends on the combo value), at the end of which the hit count is reset back to 0. This counter is important because it determines the number of items spawned by enemy deaths (and likely other things we still need to determine).
In UDoALG, enemies are classified into two main categories:
- Base enemies: they are fairies or wheel ghosts that come in organized formations
- Spirits: they come in different flavours, namely divine and animal spirits
Spirits
Killing spirits sends them back to the opponent's field. The omake mentions that shooting down divine spirits (yellow wisps) will produce animal spirits on the opponent's field, and that your distance to them as they die influences which spirit is spawned. From experimentation, here are the approximate distances:
 Spawns after 2/3 of the vertical height of the field away from the player
 Spawns between 1/3 and 2/3 of the vertical height of the field away from the player
 Spawns between point blank and 1/3 of the vertical height of the field away from the player
Note that the distances used here are absolute and include both the vertical and horizontal components. This also applies to beast spirits themselves, so for example an eagle can be sent back to the opponent's field as a wolf and vice versa. All three beast spirits have different behaviors as follows:
- Spawns at the top of the field and fly downwards quickly at a diagonal angle, firing 6 blue arrowheads in a circle
- Spawns at the sides of the field and slowly moving downwards between the two walls, firing 1 green arrowhead downwards
- Spawns at the top of the field and fly downwards in a straight line, firing 1 red arrowhead behind them that then homes onto the opponent
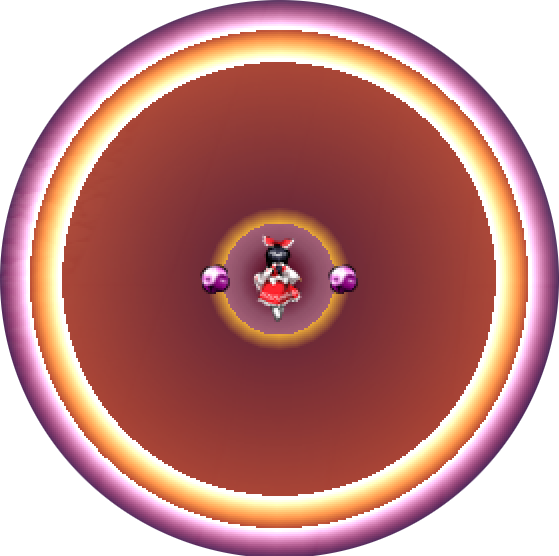
Scope
The scope, also referenced as pacifying zone or exorcism zone in the manual, is the blue zone that appears on a player's field whenever they charge up their meter. Each character has a different scope, but their main purpose an properties remain the same. They are as follows:
- Dousing spirits that enter its area of effect, allowing the player to kill them much more easily
- Slowing down bullets and base enemies that enter its area of effect
- Spawning items whenever bullets enter its area of effect
Because of these three properties, usage of character's scope is often key in victory. Generally speaking, we would categorize scopes into two big families:
- Offensive scopes: usually situated at a distance above a character, they are great to farm items when touching bullets at a distance
- Defensive scopes: usually situated around a character, they are great to slow down patterns and activate spirits in their vicinity


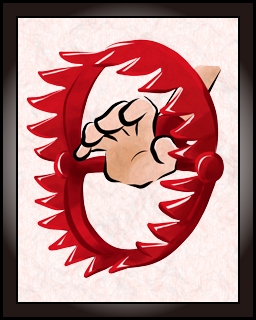
Bombs
At the start of each round, each player gets 3 bombs that they can use to clear patterns and enemies. They are pretty useful in tight spots, in particular when dealing with bosses (as they can damage them). One very important aspect of bombs however, that doesn't seem well understood generally speaking, is that the bullets and spirits they destroy send back a lot of things on the opponent's screen, often to such an extent it forces them to use a bomb on their own!
Because of that, the game pretty often resolves in so called "bomb wars" that go as follows: one player bombs their screen as it is filled with bullets and spirits. Because of that, a similar level of chaos is sent back to the opponent's screen, and they bomb in turn. Hence and repeat until every bomb has been used. With the default number of bombs, this is very favorable to the player that didn't start the war, as long as there is enough stuff on one's field to send back to the others. This means under normal circumstances, the first player to bomb loses the bomb war, and often, with it, the round.
In this game, bombs work with the meter energy you gathered and consumed all of it until only enough energy to use a character's C1 ability is left. However, the length and maximum size of a bomb is actually impacted by the amount of energy consumed, so that energy isn't entirerly lost.
Bosses
Whenever a character uses their C4 ability, it sends over a boss on the opponent's screen. Depending on the level of said attack, it will either start firing patterns corresponding to a spell or a nonspell. Usually, the first time a boss attack is performed, only the nonspell is cast, then only the spell, and eventually both the nonspell and spell are performed one after the other.
A really interesting property of these attacks is that when cleared, either by damaging the boss enough or by timing out the pattern, the field is fully cleared off any bullets and enemies. This makes it an additional mechanic that allows to reverse a lot of patterns onto the opponent's screen, that works similar to bombs.
Ability Cards
This game allows you to use one ability card in PVP. Here is a detailed list of them:
Click to expand
 |
Increased damage to Beast Spirits |
 |
Additional homing shots |
 |
Smaller hitbox |
 |
Additional laser |
 |
Increases charge speed |
 |
Increases scope size |
 |
Adds 2 bombs |
 |
Bombs last longer |
 |
Additional front missile |
 |
Additional snake shots |
 |
Additional frog shots |
 |
Additional vertical shikigami option |
 |
Additional horizontal shikigami option |
 |
Additional penetrating phantom shots |
 |
Allows user to pass through quelled spirits safely |
 |
Additional vertical tube shot |
 |
Additional horizontal tube sho |
 |
Additional leaf shots |
 |
Destroy bullets when barrier breaks |
 |
Powers up your Otter Spirit attacks |
 |
Weakens enemy Otter Spirit attacks |
 |
Powers up your Wolf Spirit attacks |
 |
Weakens enemy Wolf Spirit attacks |
 |
Powers up your Eagle Spirit attacks |
 |
Weakens enemy Eagle Spirit attacks |
 |
Additional movement-tracing option |
 |
Buffs damage against nearby enemies |
 |
Additional gold pole shots |
 |
Allows user to pass through Otter Spirits |
 |
Additional trap shots |
 |
Allows user to pass through Wolf Spirits |
 |
Additional syringe shots |
 |
Allows user to pass through Eagle Spirits |
 |
Additional tracking shots |
 |
Some bullets become slower |
 |
Additional oni shots |
 |
C3 and C4 meter attacks now grant 1/3 of a bomb |
Tier List
Please note that since the game came out pretty recently, this tentative tier list is mostly based off our feeling about characters, isn't rooted in empiric data (actual PVP matches like for PoFV), and is subject to changes as the community discovers new game mechanics.
| SS | ||||
|---|---|---|---|---|
| S | ||||
| A | ||||
| B | ||||
| C | ||||
| D | ||||
| E |
Chiyari Tenkajin

|
|
Upsides:
- Base shot: best damage in game, enough to kill most enemies and clear bosses easily
- Ex attack: best in game, a purple non-cancellable, non-grazable purple wisp that moves towards the opponent
- C1: shoots needles in a semi circle above the player, allowing for crowd control
- C2: makes her ex attack bigger for a around 4 seconds before they start decreasing in size back to normal
- C3: spawns a considerable swarm of ex attacks in a circle around the opponent
Downsides:
- Scope: small and only deals meagre damage to nearby enemies
- Base shot: slow speed, which means damage to enemies is a bit delayed
- Ex attack: opponents using their scope can slow them down (very useful for characters with centered scope)
- C1: locks her out of using her gauge for around 1 second, and that applies to C2/C3/C4
- Nonspell: feeds the opponent a lot of meter as she fires arrowheads lines that are easily scoped and streamed
- Spell: is a very slow to deploy and sparse pattern of red fireballs stopping before turning purple and moving again
Strategy:
- Use her C3, then C2 to fill up the opponent's field with her broken ex attack (hence her tier)
- Avoid using C1 and C4 as they are suboptimal
Reimu Hakurei

|
|
Upsides:
- C1: shoots four amulets that pause for a while a bit above her, dealing a lot of damage
- C2: best in game, it cancels bullets around Reimu, deletes enemies and bosses, and often pays for itself
- C3: summons a lot of big bouncy yin yang orbs and upgrades really well
- Nonspell: fires red amulets that home onto the opponent after a while, forcing movement
- Spell: spams small yin yang orbs that bounce around and circle the opponent
Downsides:
- Scope: pretty small and doesn't provide much defensively (slowdown) or offensively (farm)
- Base shot: unfocused it deals very weak damage, forcing her to focus to kill enemies, hurting mobility
- C2: bloom effect hurts visibility, making dodging non cancellable ex attacks challenging
Strategy:
- Spam C2 to clear field off bullets and bosses (move backwards after C2 for safety, forward to reach boss)
- Spam C3 to upgrade it, then fire it on top of C4
Marisa Kirisame

|
|
Upsides:
- Scope: it takes up a lot of vertical space around Marisa, which is great to farm items and douse spirits
- Ex attack: lasers spawning on the bottom of the opponent's field in random locations, can stack up and wall them off
- C1: spawns a stationary laser dealing a lot of damage in a straight vertical line above Marisa
- C2: can easily hit an opponent too high up in their field (usual for instance for Yuuma)
- C3: combines well with her ex attacks that can spawn on the tiny gaps it lets for the opponent to get trapped in
Downsides:
- Nonspell: fires easily dodged lasers and packs of 6 pellets that can be reflected and scoped for meter
- Spell: 2/3 lasers spawn stars where they hit wall/floor after a delay, making it weak to point blank and boss killers
- C2: lasers converge at the bottom of the opponent's field so it is usually easily dodged (meter waste) and can be farmed
Strategy:
- Spam C1 to delete bosses, use base shot to deal with most enemies
- Spam C3 to upgrade it, then fire it on top of C4
Seiran

|
|
Upsides:
- Scope: a circle at a distance above Seiran, it is a great tool to farm for items
- Base shot: rockets have a great balance of damage and speed, easily kills enemies
- Ex attack: a portal that fires a circle of slow bullets, applying pressure
- C1: fires many rockets in a row, great to speed kill bosses
- C3: sends over many ex attacks arranged in a big ring on the opponent's field, forcing micrododges
- Boss: triangles of bullets eventually take so much space on the screen they can wall the opponent
Downsides:
- Ex attack: generally speaking feeds the opponent a lot of meter as it can easily be scoped
- C2: rockets fired from everywhere at the bottom of her field, but worse damage than base shot C1 + locks gauge
- C3: backfires in some matchups, as characters that can cancel them can completely counter it
- Boss: easily dodged triangles initially feed the opponent meter
Strategy:
- Avoid using C2 (akin to a timing error), spam C1 instead to kill tough enemies and bosses
- Susceptible to bullet cancelling mechanics so avoid these matchups: Reimu, Yachie, Yuuma, Enoko
- Spam C3 to upgrade it, then fire it on top of C4
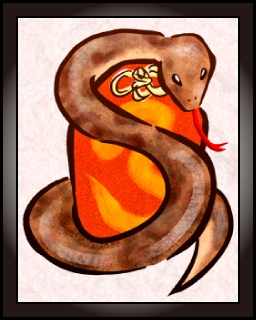
Zanmu Nippaku

|
|
Upsides:
- Base shot: being spread out, it can easily pop off spirits created by her skill to start big hit chains
- Ex attack: non cancellable lance that pins into the floor and stays active for a while before disappearing
- C2: converts all enemies on her field, including beast spirits from matriarchs and Orin's ex attack
- C3: fires many needles, keeping the opponent off bottom and sides of their field, restricting navigable space
- Boss: fires orbs and fireballs arranged in loose chunks forcing the opponent to stream around, combines well with needles
Downsides:
- Base shot: doesn't deal a lot of damage, making her reliable on equipment cards to kill enemies when her skill isn't available
- C1: doesn't fire alongside her skill, meaning she needs to fire again after her 1 second charge delay is over to pop them off
Strategy:
- Great counterpick for characters with spirit based ex attacks (Rin, Yachie, Saki, Yuuma)
- Use C2 whenever a lot of enemies are on her field to score hit combos and meter
- Use equipment or C1 to boost her damage when C2 isn't ready
- C3 and C4 are usually both viable, combine both when possible
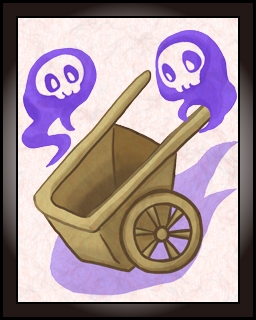
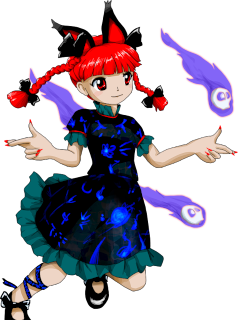
Rin Kaenbyou
|
|
Upsides:
- Scope: fast scope that scans an area above Rin, dousing spirits encountered along the way and generating items
- Ex attack: really tanky red evil spirits that are resilient to being doused and fire red arrowheads in a circle (in Lunatic)
- C1: cart following her scope, it deals good damage and synergizes well with her skill, popping off the wisps it generates
- C2: transforms base enemies (fairies, wheels) into wisps, that get popped off instantly by the C1 fired alongside
- C3: summons a swarm of red evil spirits that clump into a pretty hard to escape mass
Downsides:
- Base shot: weak damage and spread makes it hard to use efficiently, making C1 her main offense
- C2: only douses animal spirits instead of turning them into wisps like Zanmu's skill
- Nonspell: fires a checkered pattern that contains a few reflectable pellets
- Spell: zombie fairies are slow and easily killed, neutralizing the pattern for a while
- Bug: her skill may summon a wisp on top of her which triggers a hit if used on the upper half of her field
Strategy:
- Avoid playing her against Zanmu, or in this matchup avoid C3
- Use C2 whenever a lot of base enemies are on her field to score hit combos and meter
- Spam C3 to upgrade it, as her chains will then triggered enhanced versions, then fire it on top of C4
Enoko Mitsugashira

|
|
Upsides:
- Scope: fast three headed scope at a distance above Enoko, great for its item farming potential
- Base shot: deals high damage, moves fast, in a spread while unfocused, or a smaller area while focused
- Ex attack: a stationary damaging zone that occupies a place on the opponent's field for an extended time
- C1: a set of three bear traps that deal great damage and cancel some bullets as they close toward the end of their path
- C2: many bear traps are fire in a tri-shot, cancelling bullets along their path and dealing high damage: a great defensive skill
- C3: summons of swarm of ex attacks in a random positions in a zone around the opponent's height, along their field's width
- Boss: combines well with C3 as it denies space in the upper part of the screen
Downsides:
- Scope: not great defensively at it spawns at a distance from Enoko, meaning she also can't douse close up spirits
- C3: susceptible to the opponent misdirecting spawn by going up on the screen (keeping the bottom of their field empty)
- Boss: the patterns it fires during the spell and nonspell are easily dodged and farmed on their own
Strategy:
- Avoid playing her in matchups against boss killers (Marisa, Seiran) as they'll get an easier time dealing with ex attacks
- Use C2 to clear up bullets on her field or deal damage against bosses, use C1 instead when no meter for C2 / economizing it
- Spam C3 to upgrade it, but don't hesitate to fire a C4 early to deny the opponent space
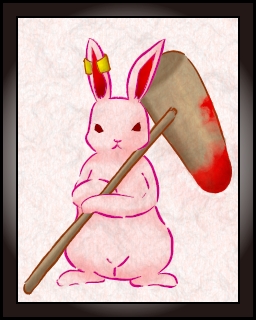
Yuuma Toutetsu

|
|
Upsides:
- Scope: can eventually take up all of her field's area, slowing down most bullets and enemies, instantly dousing spirits
- Ex attack: eagles are likely the best enhanced animal spirits as they home in onto the opponent when coming out of stun
- C1: the spoon is a very useful tool to delete bullets and start chains, as it is Yuuma's main damaging option
- C3: summons several eagles in a circle that travel down, firing blue arrowheads in a circle even low on the opponent's field
Downsides:
- Base shot: weak damage and alternates between 1 and 2 forks, so Yuuma needs to fight high up on her field
- Ex attack: as enhanced eagles are an animal spirit, they can be destroyed, especially by a few specialist characters
- C2: the big spoon doesn't deal great damage or cancel a lot of bullets considering how long it takes to charge up / its graphics
- C3: dousing the eagles as they spawn makes them stack up on a single point, making the pattern much easier to dodge
- Nonspell: easily dodged and farmed flurry of red fireballs that form pretty wide corridors, allowing opponents to get reach her
- Spell: Yuuma spawns rice bullets behind her that take a while to turn into fireballs, making her susceptible for extended time
Strategy:
- Avoid playing her in matchups against animal spirits killers (Zanmu, Reimu) as they will get a lot of free C3/C4
- Use C1 and scope to make navigating patterns easier, turning Yuuma into one of the best characters defensively speaking
- Spam C3 to upgrade it, only fire C4 in late game if you can support it with a fully enhanced C3
Ran Yakumo

|
|
Upsides:
- Base shot: can strategically be placed (for instance under bosses) as it gets locked in place when Ran focuses
- C1: an enhanced version of her base shot that fires continuously for around 2 seconds, it combines well with her skill
- C2: upgrades her base shot from 2 to 4 options for around 10 seconds, doubling her damage input during this time frame
- C3: fires a lot of ex attacks that come from all 4 cardinal directions, upgrades pretty well into a pretty tight pattern
- Spell: while Ran fires amulets in a circle, she also summons Chen that homes onto the opponent after firing her own pattern.
Downsides:
- Scope: spawns in Greek cross shape around ran, which isn't great either for offense or defense at it doesn't cover much space
- Bomb: is static and fails to reach very high or on the side of her field, making it weaker than most other characters'
- Ex attack: on its own not very threatening as it doesn't take much space and can be easily sidestepped
- Nonspell: Ran fires blue amulets in a circle, which is pretty trivial to dodge under normal circumstances
Strategy:
- Ran can turn into somewhat of a boss killer when combining her base shot lock on with C2 and C1
- Since both her C3 and C4 spell are viable, I suggest upgrading both equally to maximize chaos
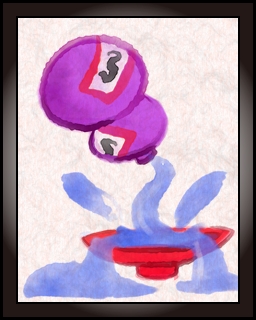
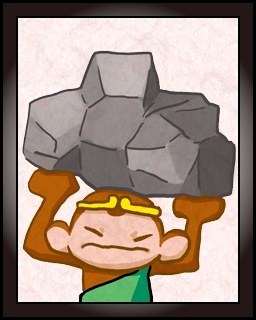
Suika Ibuki

|
|
Upsides:
- Base shot: 2 options follow Suika, granting her choice between spread and concentrated attacks depending on movement
- C1: fires continuously for around 2 seconds, useful if in need of more damage in a rush
- C2: fires continuously for around 4 seconds, useful to kill tough enemies or bosses
- C3: fires many mini-suika that spawn at the top of the opponent's field along all of its width; it can eventually wall
- Nonspell: she spins and fire mentos and cancellable pellets, which can become pretty hard to dodge at later levels
- Spell: she morphs into invincible fog and moves down towards the opponent for 2 cycles before going back up the 3rd one
Downsides:
- Scope: her options lock in place and small circles spawn around them, but they reset position once she stops charging
- Ex attack: it is destructible by shots and predictable (mini Suikas wobble synchronously left and right firing purple fireballs)
- Spell: when outside of her fog, Suika has sadly very low HP, making capturing this spellcard easy with damaging characters
Strategy:
- Avoid playing her against characters that have access to good damage or bullet cancel (as both hurt her slow ex attack a lot)
- Since Suika's spell can backfire during endgame, it is advised to upgrade it a bit first to improve its low HP
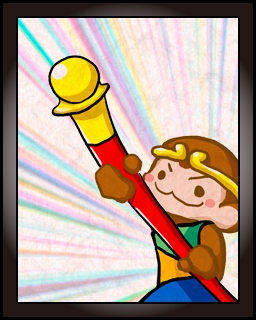
Biten Son

|
|
Upsides:
- Scope: an emptied out octagon taking a lot of space on her field, which is great to farm items
- Ex attack: big rods that home onto the opponent, forming pretty difficult patterns when stacked up
- C2: rods spawn from the bottom in two waves and dealing pretty good damage on all her field
- C3: big rods spawn around the opponents in up to two waves, sometimes in odd locations, making it challenging to dodge
- Boss: arrows move fast during the nonspell and form long corridors during the spell, both limiting movement
Downsides:
- Base shot: spreads on the sides while Biten is unfocused, so she needs to focus to deal decent damage, hurting mobility
- C1: spread attack that fires everywhere above her, hitting most enemies but not dealing great damage
- C2: sadly doesn't deal reliable enough damage to kill upgraded bosses, making it situational
- Boss: because it forms pretty consistent corridors, making it easy to farm for meter items
Strategy:
- Use Biten's scope to aggressively farm items and spam her C3 attack to upgrade it
- Her boss attack actually combines decently well with her ex attack and C3 as it limits movement
Hisami Yomotsu

|
|
Upsides:
- Scope: a circle that takes up a lot of space around Hisami, making it great to farm items but also defensively
- Ex attack: a bramble curvy lasers that slowly moves down the opponent's field, dividing easily space in it when stacked up
- C3: spawns a lot of brambles all around the opponent's field, suffocating them easily into tight spaces
- Spell: Hisumi fires several brambles that curve outwards before going back inwards, trapping the opponent in tight spaces
Downsides:
- Scope: because it goes so far behind Hisami, it can sometimes be detrimental (for instance against Rin)
- Base shot: two dish options that home in onto enemies until killed and deals low damage, challenging to use
- C1/C2: two upgrades to her base shots that feel mandatory to use for her to kill enemies
- Ex attack: sadly cancellable, meaning her matchup against characters that have access to bullet cancel is bad
- Non spell: arrowheads and pellets are fired around before curving at the bottom of the field, easy to dodge on its own
Strategy:
- Susceptible to bullet cancelling mechanics so avoid these matchups: Reimu, Yachie, Yuuma, Enoko
- Spam her C3 during her C4 spellcard to drown the opponent in brambles
- Use her scope to farm for items (in particular against characters using spirit based ex attacks)
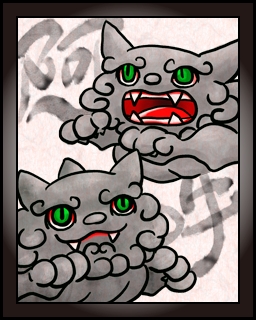
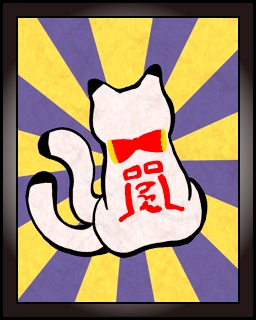
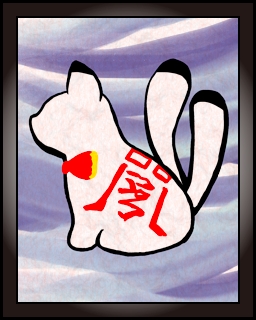
Mamizou Futatsuiwa

|
|
Upsides:
- Ex attack: green and red dogs coming from the sides, very fast blue eagles coming from the top, they are non cancellable
- C2: using this skill grants Mamizou 1/3 of a bomb, allowing her to farm them early on in a round
- C3: fires a lot of ex attacks that can stack in a pretty difficult pattern, easy to confound with animal spririts
- Spell: fires ex attacks that can be hard to dodge amidst other ones that spawn naturally or from her C3
Downsides:
- Base shot: spread when unfucosed, so she needs to focus in order to deal reliable damage, hurting mobility
- Bomb: being stationary hurts this bomb and Mamizou's skill a lot as she needs to stay high on her field for it to clear well
- C1: redundant with base shot and does deal damage in a spread, making it pretty situational
- C2: it takes a pretty long time to charge up, making it difficult to use under pressure
Strategy:
- Try to farm 1 or 2 bombs in early game to be able to win bomb wars (requires good placement when bombing)
- Spam her C3 during her C4 spellcard to drown the opponent in ex attacks
Sanae Kochiya

|
|
Upsides:
- Base shot: as it is fast and has homing properties, she's likely to keep hit combos as long as there is an enemy on her field
- Ex attack: these snake like lasers are non cancellable and cannot be slowed down by scope!
- C2: very useful to delete activated spirits and enemies around Sanae, potentially triggering automatic C3/C4
- C3: fires many lasers ex attacks that cross each other and can wall off the opponent once upgraded enough
- Nonspell: fast amulets and pellets circles are pretty hard to dodge properly
- Spell: fires fast amulets and pellets around Sanae in a incoherent pattern, making it hard to dodge
Downsides:
- Scope: only starts being deployed after a delay of around 40 frames (2/3 of a second)
- Base shot: because it targets the enemy closest to Sanae's height, it tends to completely miss the boss, making it hard to kill
- C1: weak damage and targets enemies weirdly after a delay, making it subpar and situational compared to base shot or C2
Strategy:
- You can activate spirits and detonate them with Sanae's C2 when an enemy chain comes close to try and send free C3/C4
- Try to also use C2 to clear the screen of enemies so that you can shoot a boss on her screen until the next wave
- Both her C3 and C4 are pretty good so you're free to upgrade either or both at the same time
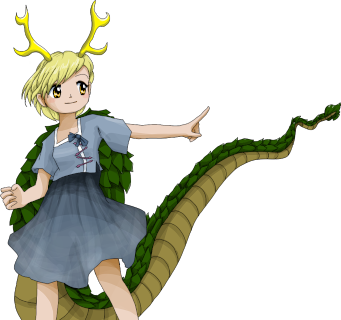
Yachie Kicchou
|
|
Upsides:
- C1: small yellow shield that can be spammed pretty fast and cancels bullets
- C2: big blue shield that extends in 2 waves deleting bullets, lasers and even some non cancellable ex attacks in a wide area
- C3: fires many enhanced otters that slowly go towards the bottom of the screen in diagonals, suffocating the opponent
- Spell: shards arrange themselves in hexagonal cells that trap the opponent, really nasty when combined with C3
Downsides:
- Base shot: unfocused diagonal spread, focused shotguns, forcing her to focus at point blank for passable damage
- Ex attack: otters can be doused again as they get unstunned, which allows some characters with closed scope to farm them
- C1: very small zone and deals very low damage, only enough to kill an activated divine spirits (but not a base fairy)
- Nonspell: shards form pretty easy to spot corridors that can easily be farmed for items
- Spell: hexagonal cells can be farmed for so many items the opponent will fill all their meter easily
Strategy:
- Avoid playing her in matchups against animal spirits killers (Zanmu, Reimu, Aunn) as they will get a lot of free C3/C4
- She can actually cancel a few characters' otherwise non cancellable ex attacks (Zanmu, Mamizou)
- Use C2 to cancel patterns but also deal extended damage to chains and farm items
- Spam C3 to upgrade it, then fire it on top of C4
Saki Kurokoma

|
|
Upsides:
- Scope: great as it can both be used defensively (slow down incoming patterns, activate spirits) and offensively (item farm)
- Base shot/C1/C2: her lasers can pierce enemies, allowing her to hit a pack in several parts
- C3: fires a pack of enhanced walls that move down a bit before targeting the opponent, can easily wall
- Nonspell: fires fast arrowheads that slow down towards the bottom of the field, creating pressure
- Spell: slow lasers create pretty long corridor that are ideal for wolves to attack in
Downsides:
- Base shot: deals terrible damage which forces Saki to use her C1/C2 in some circumstances
- C1: slow charge attack that actually doesn't fire lasers directly in front of Saki, only her sides
- Ex attack: wolves can be doused again as they get unstunned, which allows some characters with closed scope to farm them
- Nonspell: because the pattern accumulates, characters with access to bullet cancel mechanics can benefit from it
- Spell: the pattern itself is actually trivial to dodge and farm, the lasers can be cancelled
Strategy:
- Avoid playing her in matchups against animal spirits killers (Zanmu, Reimu) as they will get a lot of free C3/C4
- Use her C1 to get past enemy waves that wall you, avoid using her C2 as it wastes meter
- Spam C3 to upgrade it, then fire it on top of C4 (unless fighting a bullet cancel character, then just spam C3)
Tsukasa Kudamaki

|
|
Upsides:
- Ex attack: they upgrade bullets that come through them (popcorn/pellets → ball → mentos → orb)
- Bomb: takes the shape of a rectangle that can be directed a bit and spins around several times, cancelling patterns in waves
- C1: fires tri-shot tubes continuously for 2 seconds in all 4 cardinal directions, great to hit enemies around her
- C3: fires an arc of balls and several ex attacks to upgrade them, this can eventually wall off the opponent
Downsides:
- Scope: because it only extends on her sides, it is really hard to use both offensively and defensively
- Base shot: deals pretty low damage, which the shots that go behind her don't make up for (very situational)
- C2: only reflects pellets and popcorns in a zone around Tsukasa, making it pretty situational
- Nonspell: fires kunais and pellets arranged in easy to dodge and farm corridors
- Spell: fires lasers and kunais that are easily dodged
Strategy:
- Susceptible to bullet cancelling mechanics so avoid these matchups: Reimu, Yachie, Yuuma, Enoko
- Spam her C3 as much as possible to upgrade it as fast as possible and create walls of orbs
- Avoid using her C4 as it won't do anything unless there is also ex attacks on top of it
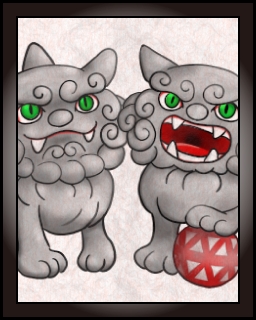
Aunn Komano

|
|
Upsides:
- Scope: during the wind up, it draws a vertical ellipse that can activate spirits in a big zone
- Ex attack: non cancellable structures that slowly move towards the opponent, able to wall them with C3
- C1: fires blue and red shots in circles around Aunn, which she can even fire her base shot along with
- C2: grants Aunn 1 full second of invincibility, allowing her to get behind patterns other characters would have trouble with
- Nonspell: fires pellets and green/red shards that cross each other in a way that can under high pressure be hard to dodge
- Spell: fires pellets and curvy lasers, upgrades allows the laser to curve a second time. Combines well with C3
Downsides:
- Scope: after its delayed wind up is done, it is one of the smallest scopes in the game, forming a small ellipse around Aunn
- Base shot: unfocused fires on the sides, and even focused it deals mediocre damage, meaning Aunn needs to rely on her C1
- Ex attack: not very threatening on its own due to its very slow speed
- C2: because of Aunn's slow unfocused speed, you cannot abuse it too aggressively
- C3: fires many ex attacks in a circle that doesn't home onto the opponent as opposed to Aunn's base ex attacks
Strategy:
- Use Aunn's skill to get out of tough spots or get past pattern that come in waves (some nonspells and spells)
- Try to upgrade her C4 first, as the nonspell and spell can become deadly, then her C3
Nazrin
|
|
Upsides:
- Scope: a small circle that spawns from Nazrin and homes onto the closest spirit
- Ex attack: spawns a blue stationary diamond that can kill the opponent and tanks their shots
- C1: fires homing yellow kunais for around 2 seconds, pretty useful to kill spirits activated by her scope
- C2: instantly killed doused spirits, which is very useful in matchups against the matriarchs
- C3: spawns many falling yellow diamonds in waves, that can wall off the opponent and tank shots
Downsides:
- Movement: fast while unfocused, but the slowest focus speed makes balancing the two difficult
- Base shot: bad damage, homes when focused which makes it difficult to hurt bosses with
- Scope: it is slow and moves on to another spirit once it doused one, making it hard to use efficiently
- Bomb: similarly to her scope, it follows spirits, making it terrible as it has trouble clearing patterns and hurting bosses
- C2: in most situations redundant with her C1, making it pretty redundant / useless
- Boss: fires easily dodged and farmed icicles, especially during the nonspell that forms corridors
Strategy:
- Decent counterpick against the matriarchs (although Zanmu fills that role better)
- Spam C3 to upgrade it and wall people, then only consider the C4 (as endgame ex attacks can protect it)